Fabrication Progress
Over the last two weeks I've done a few test prints to get an idea of how to make sure the tiara prints properly. I created a small object using the same lattice parts of the tiara in order to have a quick to print example of how the tiara might print.


I tweaked a variety of settings for getting the best results. I tested different sized nozzles, 0.4mm, 0.6mm, and 0.8mm. I tested different numbers of perimeters, as well as the number of top and bottom layers. I also played with the top and bottom fill patterns, layer height, print speed, and filament flow rates. All tests were done with 0% infill, since I needed the print to be completely hollow in order to fill the inside with fluid pigment.
In my testing, I found that the best settings were printing at a temperature 200 Celsius using a 0.4mm nozzle at a 0.2mm layer height, with 2 perimeters, and 5 top layers, 4 bottom layers, and a 0.4mm brim to increase adhesion to the build plate. Print speed was set to max of 60mm/s, with small perimeters(which all the tests consisted of) printing at 30mm/s, filament flow rate was left to default, except for bridging, where flow rate was set to only 90% of the default to reduce drooping.


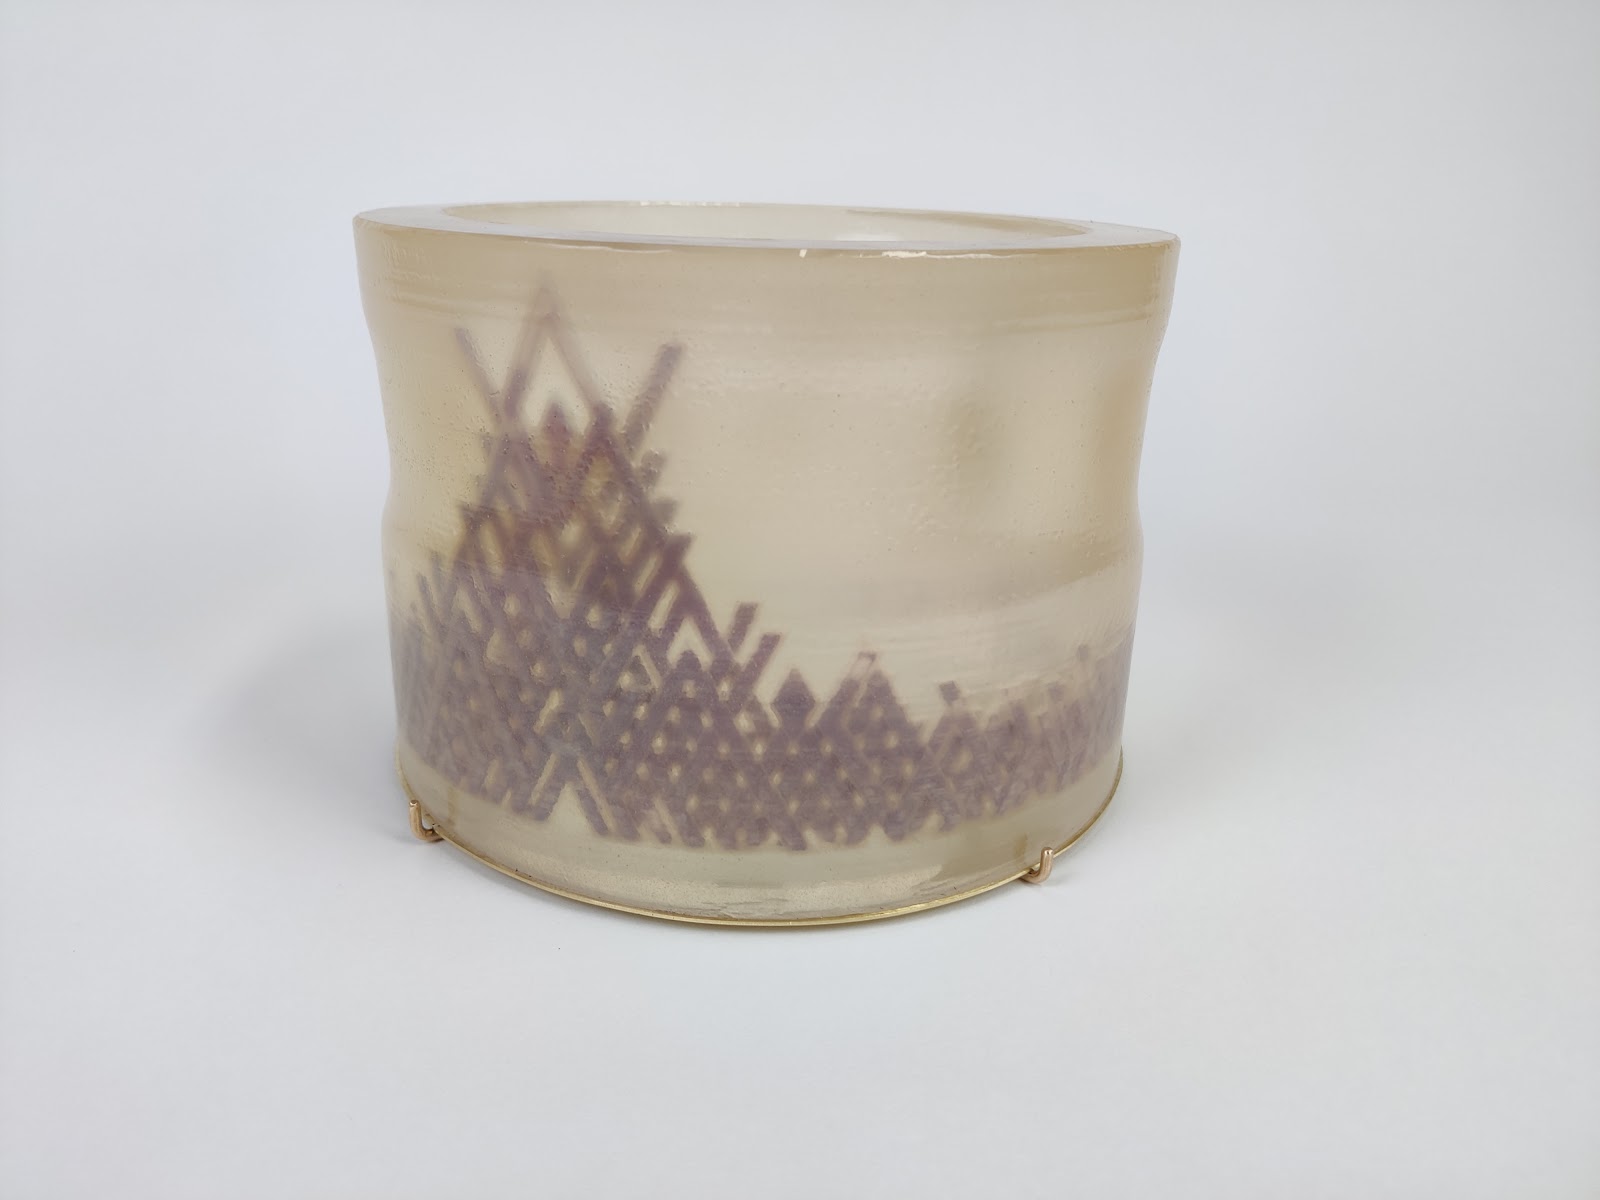
And here is that same test print after I've filled it with fluid. The fluid is a metallic powdered pigment suspended in water.
Aside from testing this smaller object, I also tested printing two part negative moulds of the tiara to then cast a positive of the tiara in a solid material with a low melting point, to then encase in resin, and then melt out, leaving a negative of the tiara that I could then fill with pigmented fluid.

Unfortunately, the print quality isn't good enough to cast with these moulds, as the gap between the two parts is far to big, and even if I were to seal the edges, there would be fare too much cleanup of excess material for this to be a worthwhile method.
Moving on, I also made a small resin mould to then cast the test object in, so I could get a better idea of what the tiara would look like after being encased in resin.

I expect the final resin cast won't contain as many bubbles, as I had placed this test casting on my 3D printer's build plate set to 60C in order to speed up the curing process. After removing the 3D printed mould using a heat gun, I applied a thin coat of UV resin, both to test the clarity of the resin as well as a method for removing the ridges left by the 3D printed mould.
For the final piece, I plan to apply a thin coat of petroleum jelly to the 3D printed mould to act as a mould release, and then I'll use a clear varnish on the surface of the resin to increase the clarity.
I've also finished printing the tiara. Using the settings I printed the test pieces with, I setup the slicer, and was relieved to see that the print wasn't going to take the 12 or more hours I was expecting it to take based on my previous experiences. With a print time of about 8 hours, I was perfectly able to start the print in the morning and monitor it throughout the day. There were a few hiccups to start, as all the tiny squares making up the base had some issues adhering properly despite my previous testing, realizing that my test prints were done in the centre of the print bed, as opposed to near the perimeter which was far more prone to not being perfectly level. Once I'd cleaned off the first failed start, I set the print to start again, but reduced my printers feed rate, which scales the entire gcode file's speed, and carefully adjusted the print bed as I watched the first layer. Even after this, adhesion wasn't great, so I stopped the print, cleaned the plate once more, and applied a glue stick to the area the tiara would print on. After this, the first layer printed perfectly, and I allowed the print to continue as normal.


With that done, I got started on printing the parts of the mould I would used to suspend the tiara in resin. I did a quick build in Rhino 8 using the 19mm thick tube I used for rendering to create a 3 part mould, a wall for the inside diameter, one for the outside diameter, and a bottom piece with an inside and outside lip to slot the walls into. I'll apply small tacks of hot glue to hold the walls in place, and with then seal the inside edges with the help of the petroleum jelly I'm using as mould release.


Future plans for finishing:
This weekend, I'll have the mould ready, and after filling the tiara with pigmented oil, I'll suspend the tiara in the resin by first pouring a 1-1.5cm layer of resin, letting it cure enough to be solid to then place the tiara on and pouring the rest of the resin. I've calculated that I should only need to use about 1.2L of resin. Once that's cured and the mould is removed, I'll apply a few coats of clear varnish to the resin, and then I'll trace out the bottom onto some paper so that I can make the brass ring and prongs for the resin to be set in.

Comments
Post a Comment